Building an internal content moderation app with Basedash in 5 minutes

July 25, 2022
Video transcript
Hey I'm Max and I'm going to show you how to build an internal app in Basedash in two minutes.
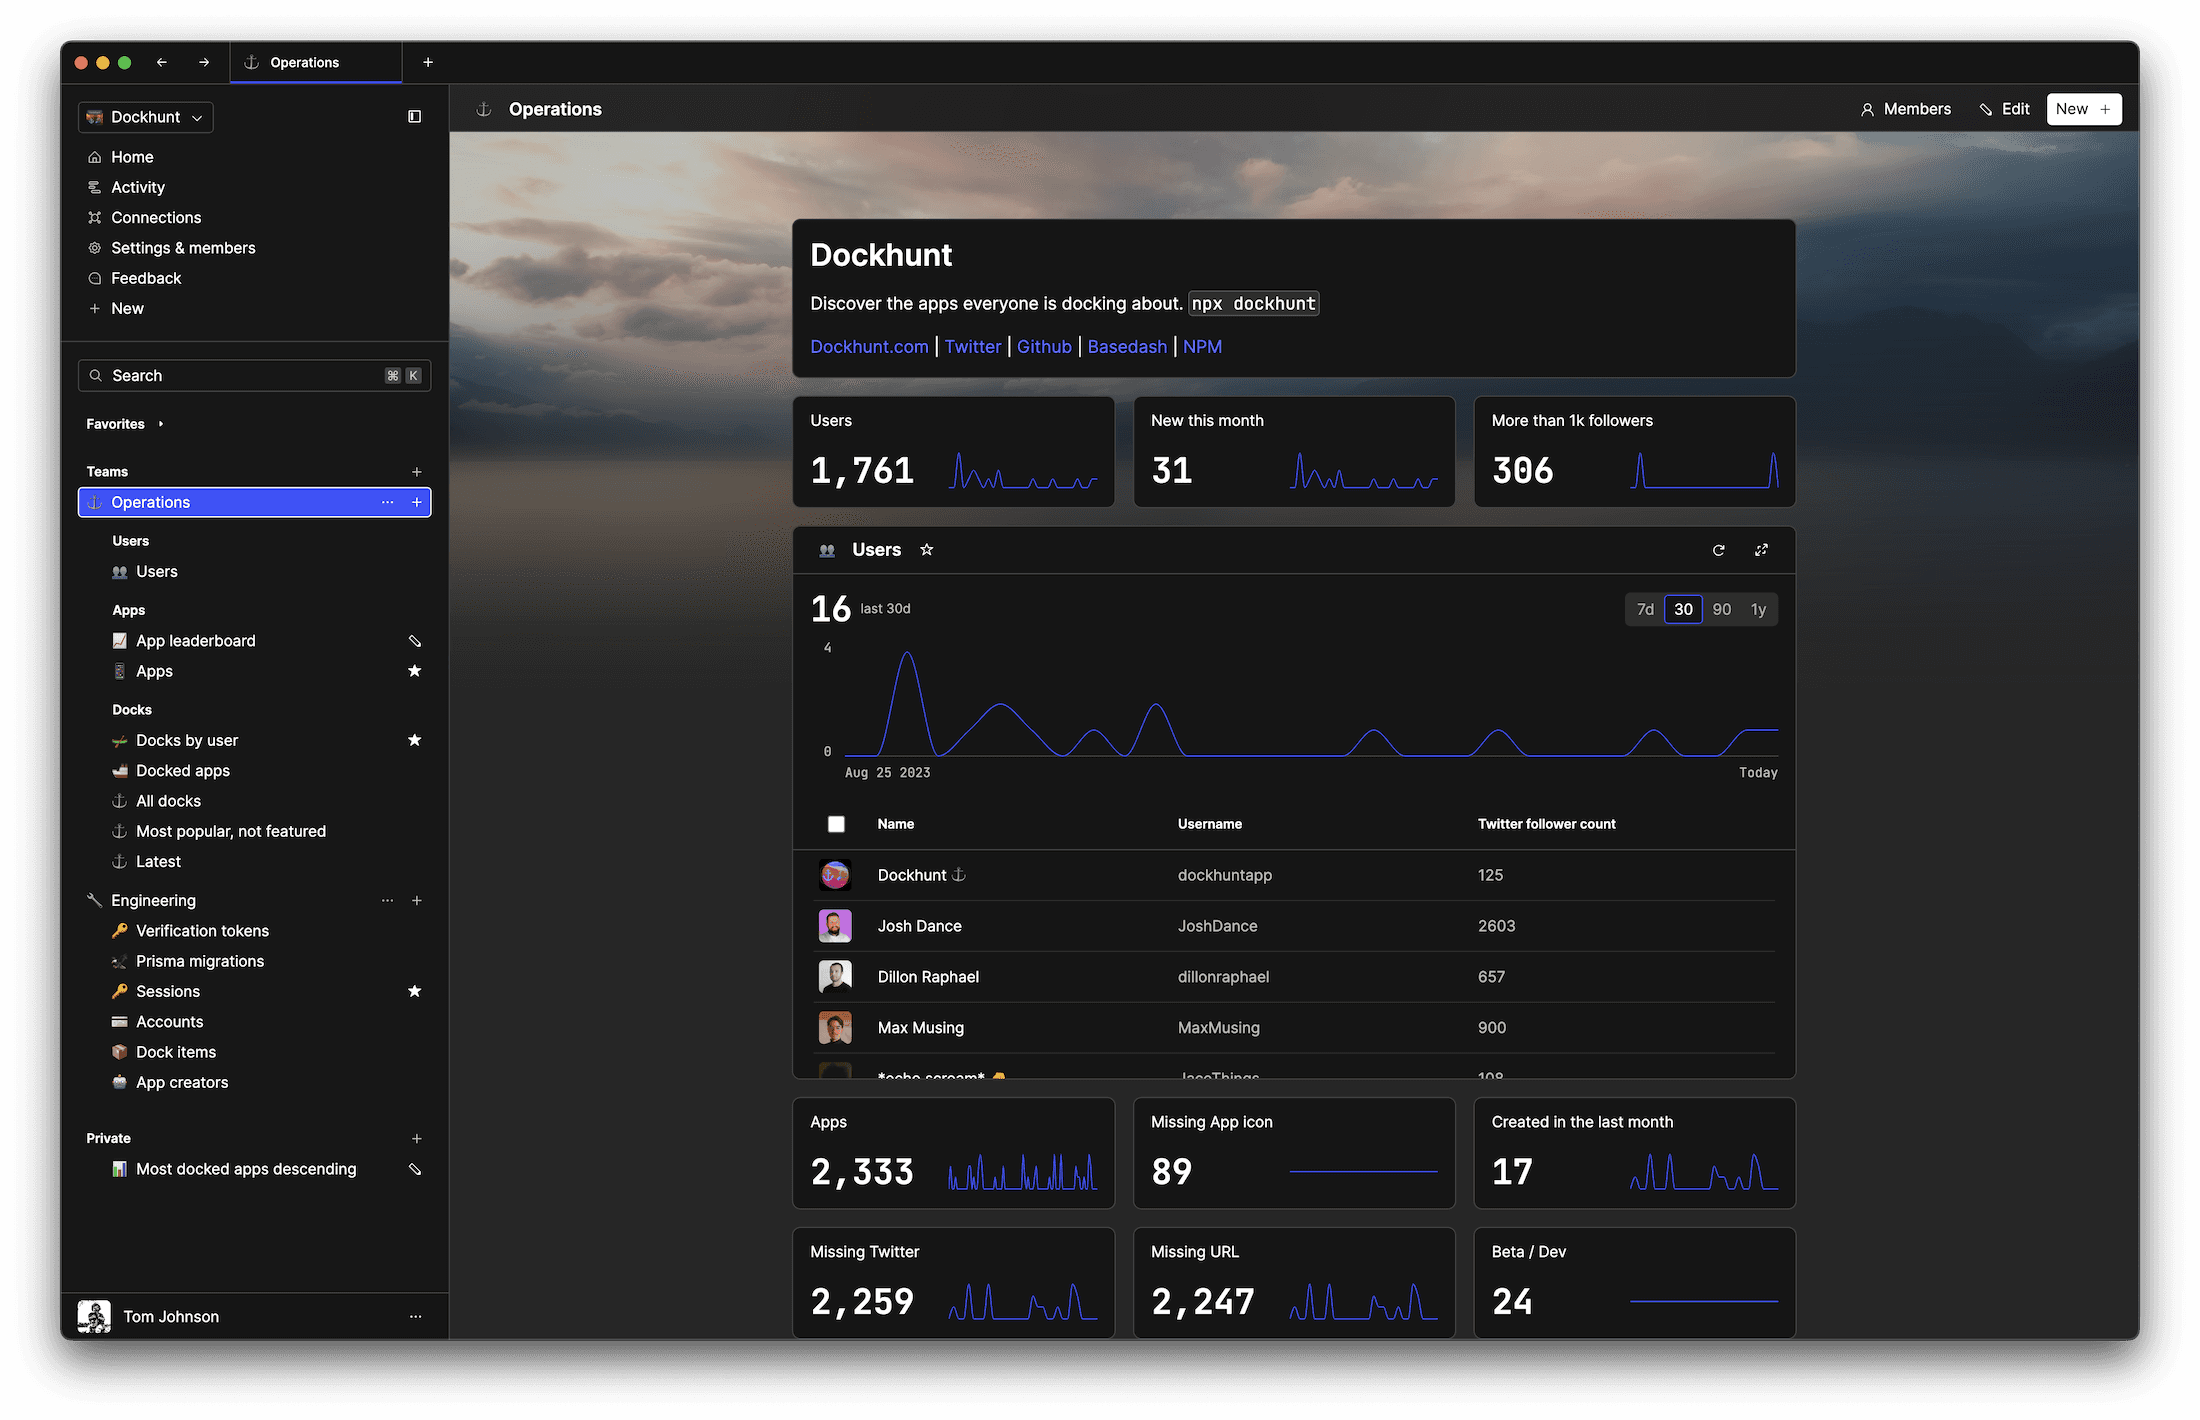
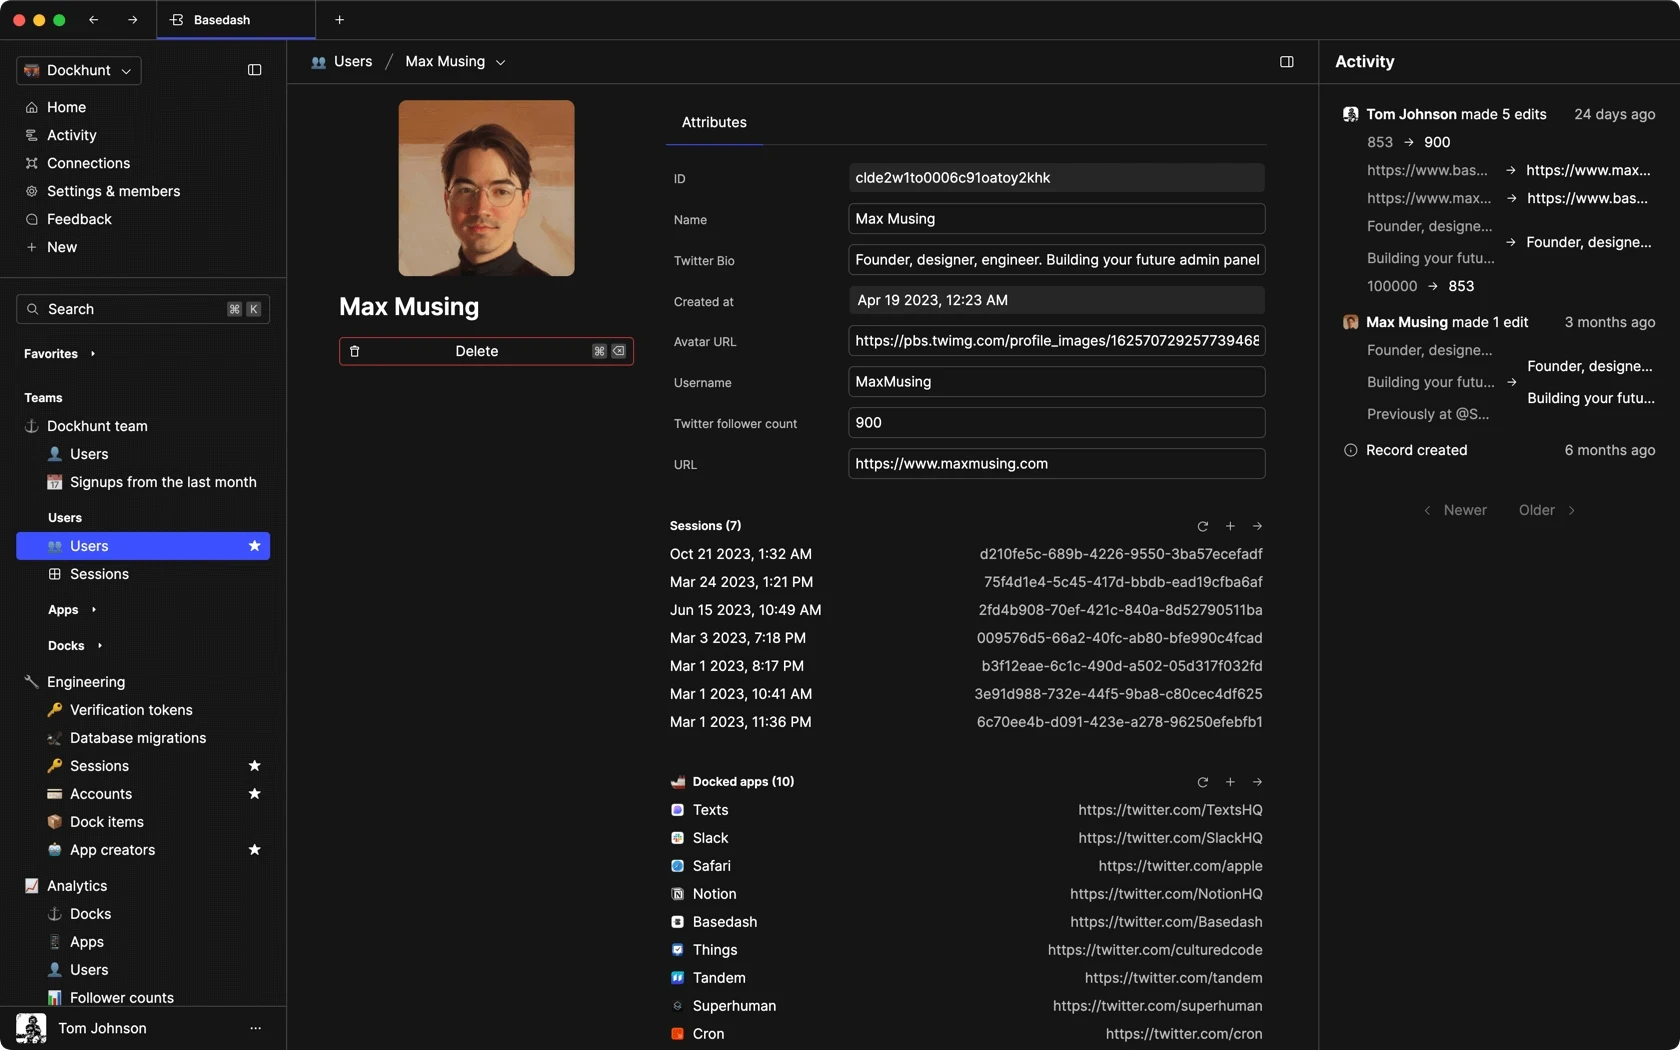
So in this example we're going to be building a content moderation app for an internal operations team but really you can build any sort of app that revolves around pulling data from a database and taking action on it. So this is the final product of what we'll have for app. Today we're going to be making this flagged comments page and so what this is doing is it's pulling data from a SQL database into this nice interface here. Specifically we're pulling comments that have been marked as flagged by our system and so our operations team is going to be able to go into this, review the contents of the comment, and then take one of two actions: they can either unflag the comment if it looks good, which is then going to update the SQL database directly, or if they find another comment that looks a little suspicious then what they can do is take an action to suspend the user, and when they run this action it's going to call an internal API that's going to lock the user's account and send them an email.
So this is all really easy to build in Basedash, let's get to it.
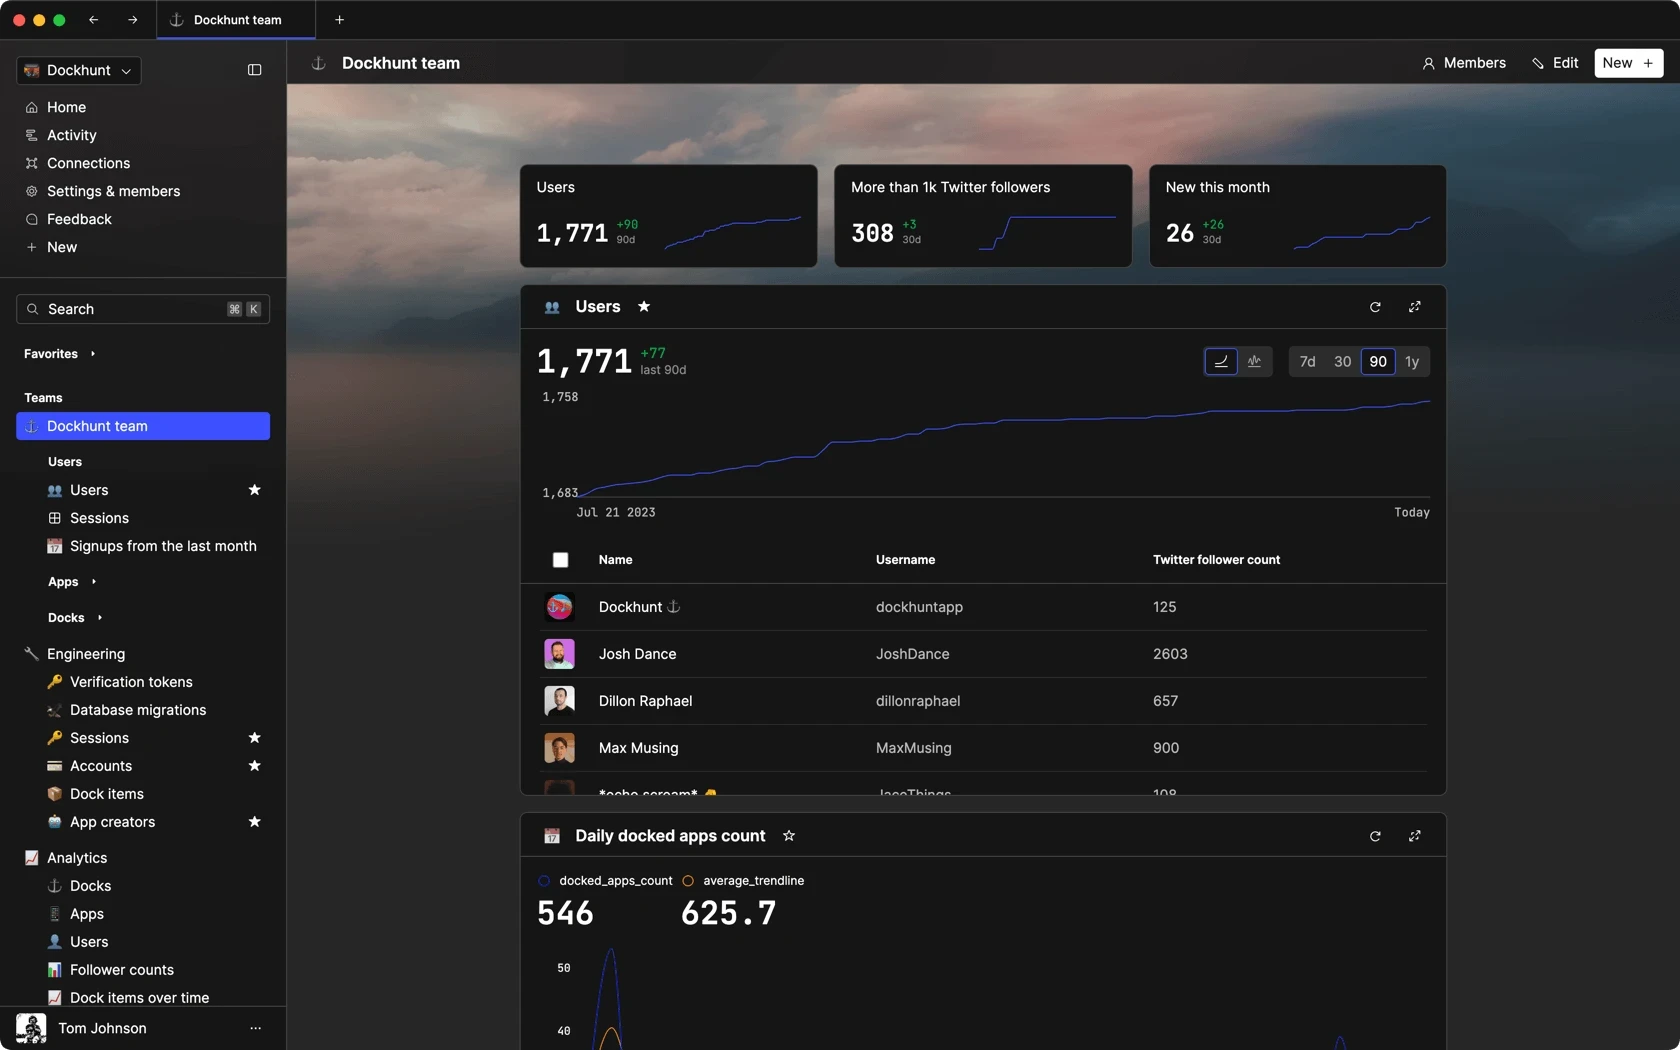
Okay, so this is our admin dashboard. We can see all of the apps we've already made for the different teams. Let's create a new app called operations, give it a little emoji here, robot, and a cover image URL. What that's going to do is just customize things so that they look good.
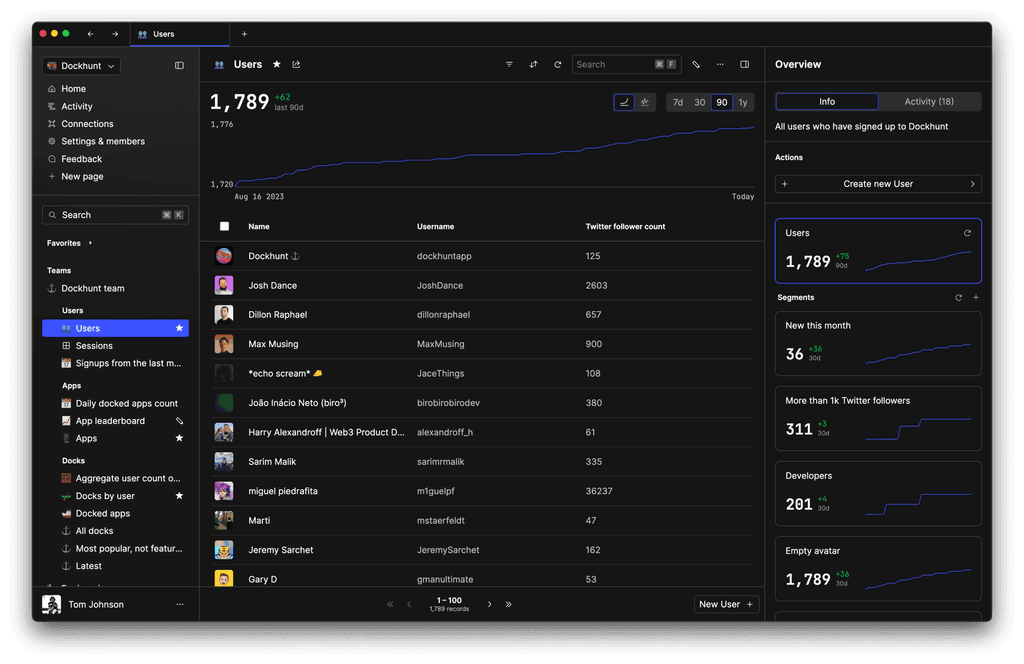
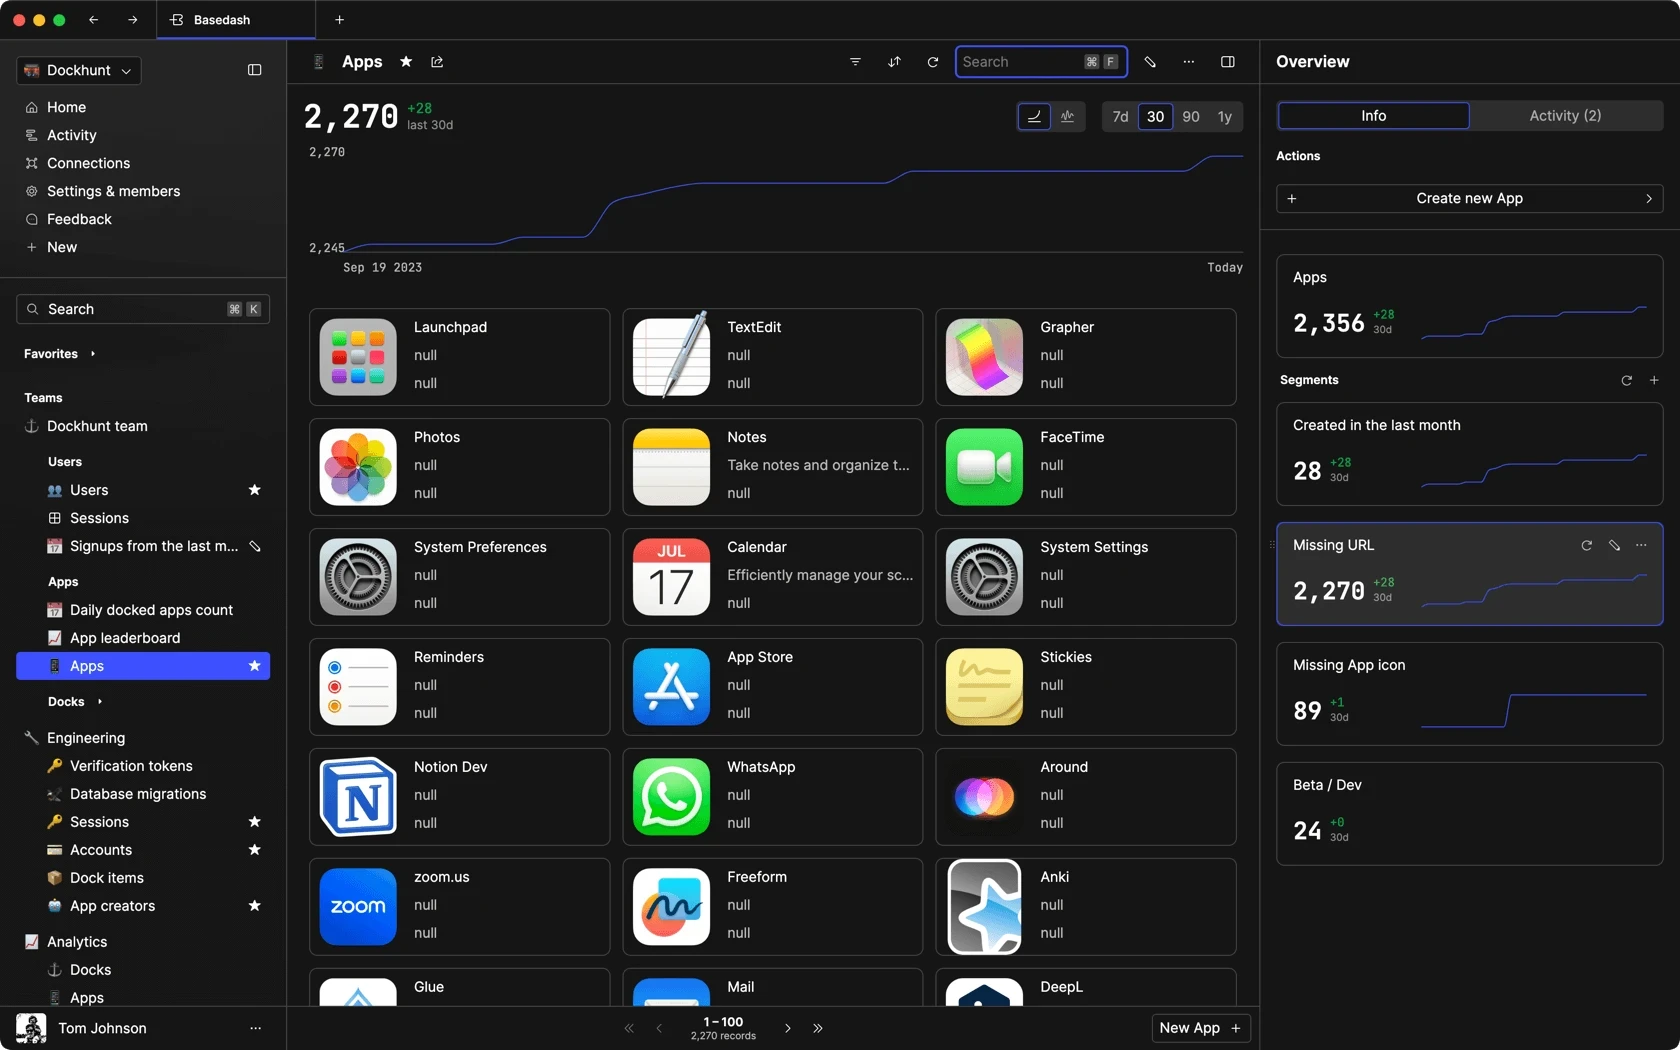
The first thing we want to do is to create a collection page in our app, so a collection page pulls data from one of the tables in our database so let's pick the comment table. We get this little preview. This data looks correct to me, so I'm going to create a view and then the first thing we can do is set a layout. And so we can pick the table layout like we had before but in this example I think a card layout makes more sense. We can also choose which of the attributes show up in each of the cards, and so I don't think we care about the ID or product, let's instead show the user and created at. So we can rearrange that that looks good to me. In the data tab we can then choose what data shows up here and so we can actually just do a join on the user table in a couple clicks like that, which then lets us enable these attributes that are coming from "User". And so the one that we care about here is profile photo and so what we can also do here is just set "display as image", which is just going to show the images in the cards like that really simple, and then we also want to add a filter so that we only get comments that are flagged. And just like that, we have our data right here that we want.
We can also go into the info tab here and just change the permissioning a little bit so we can disable creation and deletion and exporting so that all you can do on this table is view your data, flip the comments flag, and soon we'll add the action for suspending a user. I'm just going to name this "Flagged comments", give it a emoji here, and then publish it, and just like that we have our page already set up!
Next, let's hook up our action to suspend a user. We'll go to "New action" and hook it up with a new API. In this case we'll do our internal API we'll give it the base URL for our API. And then we can also add a header, so in this case we'll do an authorization header.
We can connect our API now and then we can hook up our actions. We're going to do a POST request on our API. In this case it's going to be at "users" and then the user id slash suspend. We don't know what to put here for the user ID yet, so let's just hard code it as "1". We give it a name and we can also set the name as the button text here to suspend a user for when you're running the action. And then what we can do is associate this action with a table. In this case we'll do the comment table and what that lets us do is trigger the action from the collection page that we just created. Okay, next thing we can do is create a user input. In this case we're going to be using the user ID to run the action, and what we can do is set a prefill text so that this gets automatically filled in so the user doesn't have to run it themselves. We can see these are all the attributes we can pull from, let's take the "comment.user" and use that as the prefill text. And then what we can do is take this user input we just created and stick this into the path of our endpoint.
Great that looks good to me, and then this is what the preview is going to look like. You can see the curl request right here, as soon as we type in an ID we can see that it updates the path of what it's going to hit for the endpoint. This looks good to me so let's hit save and now we have our action, and we can also see that it shows up right here inside of the collection page we just created and pre-fills the value based on the user's id.
So that's Basedash. I hope you got some inspiration as to the kinds of apps that you can build with it we've tried to make the experience as batteries-included as possible so you get everything from searching and filtering to real-time multiplayer and mobile support out of the box without having to code anything yourself we're excited to see what kinds of apps you build with it.
You could ship faster.
Imagine the time you'd save if you never had to build another internal tool, write a SQL report, or manage another admin panel again. Basedash is built by internal tool builders, for internal tool builders. Our mission is to change the way developers work, so you can focus on building your product.
TOC
July 25, 2022
Video transcript
Hey I'm Max and I'm going to show you how to build an internal app in Basedash in two minutes.
So in this example we're going to be building a content moderation app for an internal operations team but really you can build any sort of app that revolves around pulling data from a database and taking action on it. So this is the final product of what we'll have for app. Today we're going to be making this flagged comments page and so what this is doing is it's pulling data from a SQL database into this nice interface here. Specifically we're pulling comments that have been marked as flagged by our system and so our operations team is going to be able to go into this, review the contents of the comment, and then take one of two actions: they can either unflag the comment if it looks good, which is then going to update the SQL database directly, or if they find another comment that looks a little suspicious then what they can do is take an action to suspend the user, and when they run this action it's going to call an internal API that's going to lock the user's account and send them an email.
So this is all really easy to build in Basedash, let's get to it.
Okay, so this is our admin dashboard. We can see all of the apps we've already made for the different teams. Let's create a new app called operations, give it a little emoji here, robot, and a cover image URL. What that's going to do is just customize things so that they look good.
The first thing we want to do is to create a collection page in our app, so a collection page pulls data from one of the tables in our database so let's pick the comment table. We get this little preview. This data looks correct to me, so I'm going to create a view and then the first thing we can do is set a layout. And so we can pick the table layout like we had before but in this example I think a card layout makes more sense. We can also choose which of the attributes show up in each of the cards, and so I don't think we care about the ID or product, let's instead show the user and created at. So we can rearrange that that looks good to me. In the data tab we can then choose what data shows up here and so we can actually just do a join on the user table in a couple clicks like that, which then lets us enable these attributes that are coming from "User". And so the one that we care about here is profile photo and so what we can also do here is just set "display as image", which is just going to show the images in the cards like that really simple, and then we also want to add a filter so that we only get comments that are flagged. And just like that, we have our data right here that we want.
We can also go into the info tab here and just change the permissioning a little bit so we can disable creation and deletion and exporting so that all you can do on this table is view your data, flip the comments flag, and soon we'll add the action for suspending a user. I'm just going to name this "Flagged comments", give it a emoji here, and then publish it, and just like that we have our page already set up!
Next, let's hook up our action to suspend a user. We'll go to "New action" and hook it up with a new API. In this case we'll do our internal API we'll give it the base URL for our API. And then we can also add a header, so in this case we'll do an authorization header.
We can connect our API now and then we can hook up our actions. We're going to do a POST request on our API. In this case it's going to be at "users" and then the user id slash suspend. We don't know what to put here for the user ID yet, so let's just hard code it as "1". We give it a name and we can also set the name as the button text here to suspend a user for when you're running the action. And then what we can do is associate this action with a table. In this case we'll do the comment table and what that lets us do is trigger the action from the collection page that we just created. Okay, next thing we can do is create a user input. In this case we're going to be using the user ID to run the action, and what we can do is set a prefill text so that this gets automatically filled in so the user doesn't have to run it themselves. We can see these are all the attributes we can pull from, let's take the "comment.user" and use that as the prefill text. And then what we can do is take this user input we just created and stick this into the path of our endpoint.
Great that looks good to me, and then this is what the preview is going to look like. You can see the curl request right here, as soon as we type in an ID we can see that it updates the path of what it's going to hit for the endpoint. This looks good to me so let's hit save and now we have our action, and we can also see that it shows up right here inside of the collection page we just created and pre-fills the value based on the user's id.
So that's Basedash. I hope you got some inspiration as to the kinds of apps that you can build with it we've tried to make the experience as batteries-included as possible so you get everything from searching and filtering to real-time multiplayer and mobile support out of the box without having to code anything yourself we're excited to see what kinds of apps you build with it.
You could ship faster.
Imagine the time you'd save if you never had to build another internal tool, write a SQL report, or manage another admin panel again. Basedash is built by internal tool builders, for internal tool builders. Our mission is to change the way developers work, so you can focus on building your product.
What is Basedash?
What is Basedash?
What is Basedash?
Basedash is made for teams that need to move fast
Dashboards, charts, API calls, CRUD operations, SQL queries. Just connect your database, Basedash handles the rest.
Dashboards, charts, API calls, CRUD operations, SQL queries. Just connect your database, Basedash handles the rest.
Dashboards, charts, API calls, CRUD operations, SQL queries. Just connect your database, Basedash handles the rest.
Dashboards and charts
Edit data, create records, oversee how your product is running without the need to build or manage custom software.
USER CRM
ADMIN PANEL
SQL COMPOSER WITH AI