
How to create a React Native app with Expo

October 24, 2023
Expo provides a streamlined environment for building React Native apps. This guide covers the essentials: initializing a new Expo project, directory structure, development, and deployment.
Initialize a new Expo project
First, install the Expo CLI.
npm install -g expo-cli
Now, initialize a new project.
expo init my-new-project
Choose a template when prompted. You usually start with the "blank" template for a minimal setup.
Understanding the directory structure
After initialization, you'll get a directory structure like this:
my-new-project/
├── assets/
├── node_modules/
├── App.js
├── app.json
└── package.json
assets/: Store your images, fonts, and other assets here.App.js: Your main application file.app.json: Contains configuration settings.package.json: Lists your dependencies.
Running the development server
Start the development server with:
expo start
A QR code appears in your terminal. Scan it with the Expo Go app on your phone to see your project live.
Installing packages
You can use npm or yarn for package management.
# npm
npm install react-navigation

# yarn
yarn add react-navigation
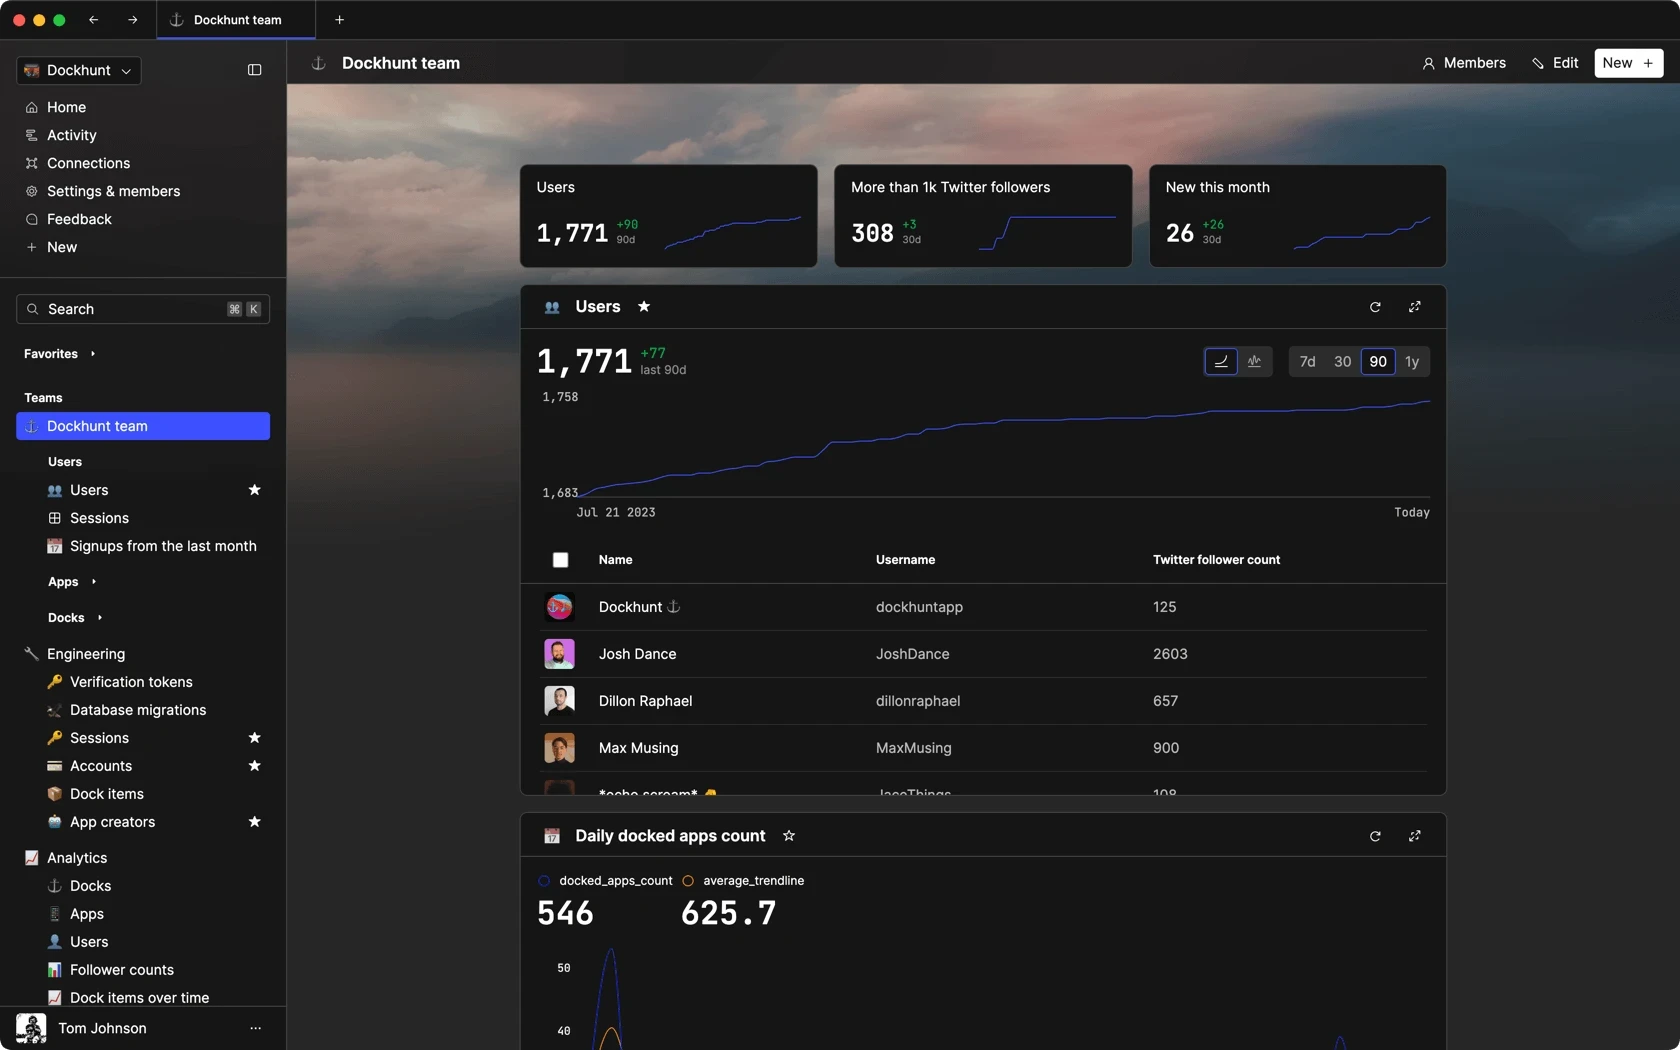
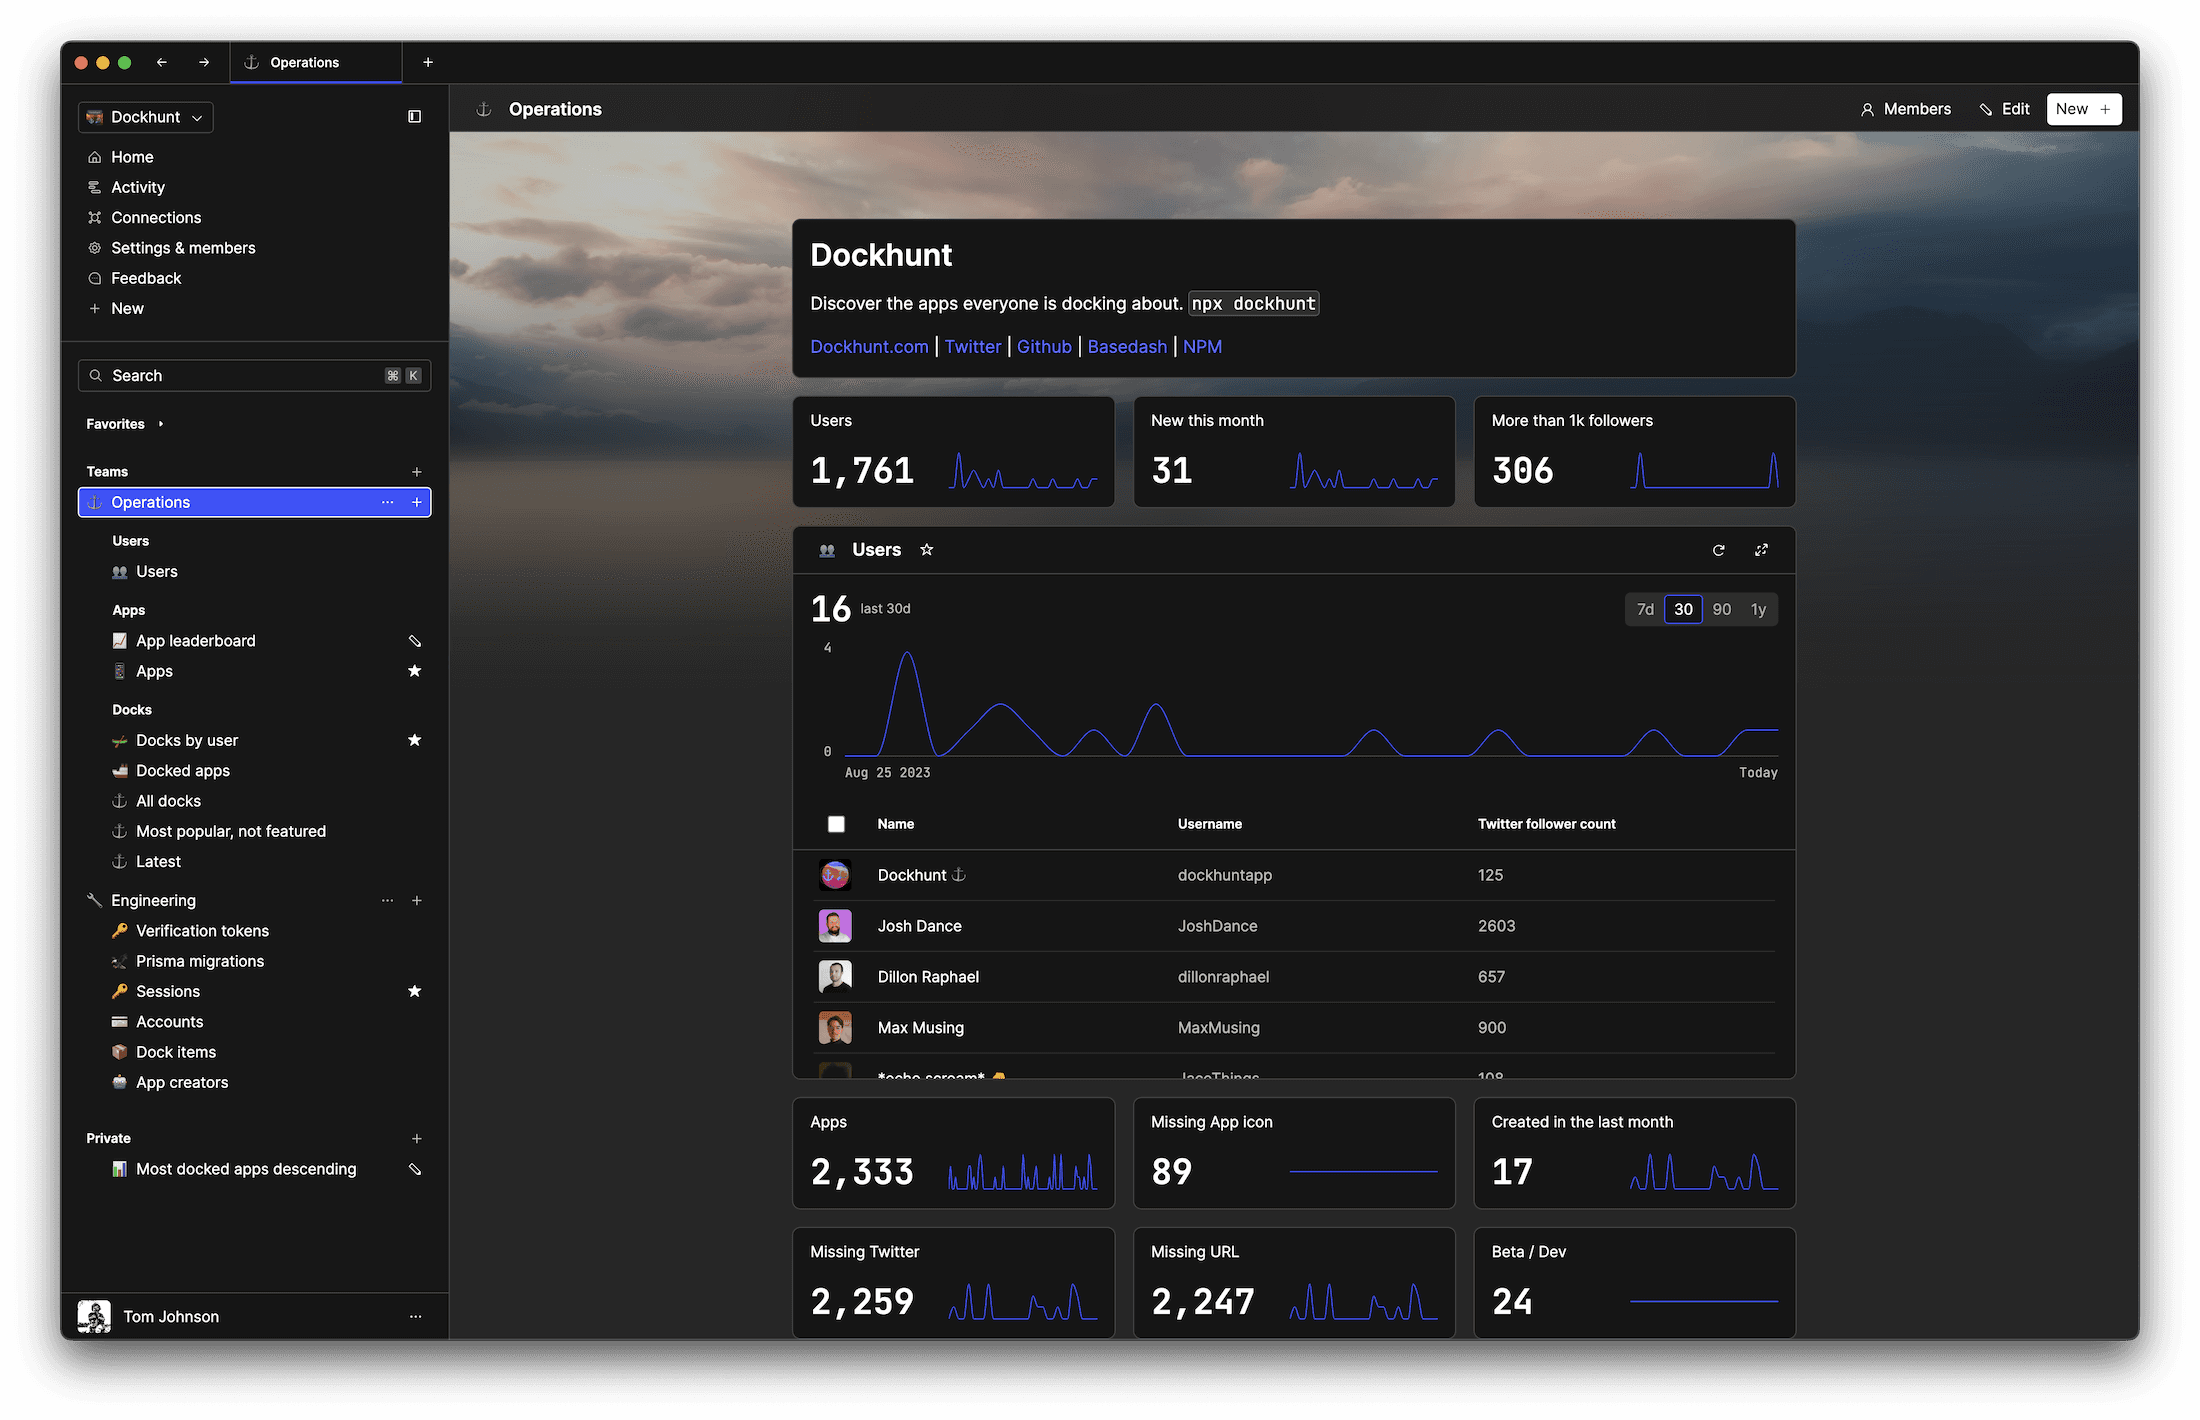
You could ship faster.
Imagine the time you'd save if you never had to build another internal tool, write a SQL report, or manage another admin panel again. Basedash is built by internal tool builders, for internal tool builders. Our mission is to change the way developers work, so you can focus on building your product.
Using native modules
If you need to eject from Expo for more control over native modules, you can run:
expo eject
Debugging
Use the built-in Expo DevTools for debugging. You can access them at http://localhost:19002/ when your development server is running.
Building for production
For Android:
expo build:android
For iOS:
expo build:ios
Deploying
After building, you can publish updates to your app using:
expo publish
Leveraging Basedash for team collaboration
For apps that heavily rely on backend data, a platform like Basedash can streamline your workflow. It generates an admin panel for your SQL database, allowing you to easily share access with your team and manage data. Basedash also supports running and sharing SQL queries, so it can act as a central hub for data manipulation and visualization, especially helpful for apps under active development.
TOC
October 24, 2023
Expo provides a streamlined environment for building React Native apps. This guide covers the essentials: initializing a new Expo project, directory structure, development, and deployment.
Initialize a new Expo project
First, install the Expo CLI.
npm install -g expo-cli
Now, initialize a new project.
expo init my-new-project
Choose a template when prompted. You usually start with the "blank" template for a minimal setup.
Understanding the directory structure
After initialization, you'll get a directory structure like this:
my-new-project/
├── assets/
├── node_modules/
├── App.js
├── app.json
└── package.json
assets/: Store your images, fonts, and other assets here.App.js: Your main application file.app.json: Contains configuration settings.package.json: Lists your dependencies.
Running the development server
Start the development server with:
expo start
A QR code appears in your terminal. Scan it with the Expo Go app on your phone to see your project live.
Installing packages
You can use npm or yarn for package management.
# npm
npm install react-navigation

# yarn
yarn add react-navigation
You could ship faster.
Imagine the time you'd save if you never had to build another internal tool, write a SQL report, or manage another admin panel again. Basedash is built by internal tool builders, for internal tool builders. Our mission is to change the way developers work, so you can focus on building your product.
Using native modules
If you need to eject from Expo for more control over native modules, you can run:
expo eject
Debugging
Use the built-in Expo DevTools for debugging. You can access them at http://localhost:19002/ when your development server is running.
Building for production
For Android:
expo build:android
For iOS:
expo build:ios
Deploying
After building, you can publish updates to your app using:
expo publish
Leveraging Basedash for team collaboration
For apps that heavily rely on backend data, a platform like Basedash can streamline your workflow. It generates an admin panel for your SQL database, allowing you to easily share access with your team and manage data. Basedash also supports running and sharing SQL queries, so it can act as a central hub for data manipulation and visualization, especially helpful for apps under active development.
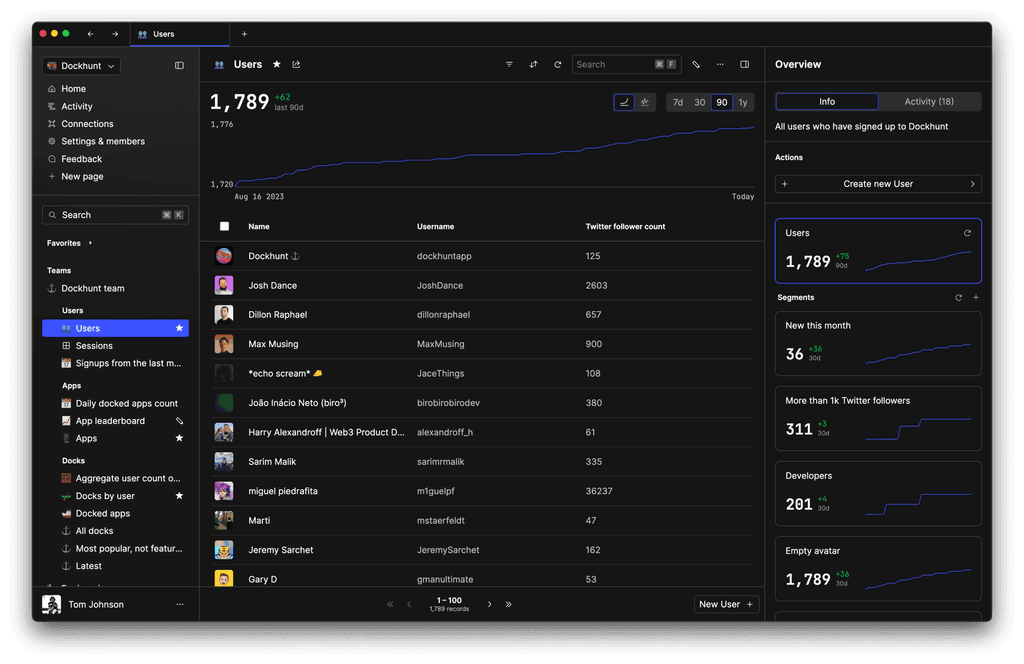
What is Basedash?
What is Basedash?
What is Basedash?
Ship faster, worry less with Basedash
Ship faster, worry less with Basedash
Ship faster, worry less with Basedash
You're busy enough with product work to be weighed down building, maintaining, scoping and developing internal apps and admin panels. Forget all of that, and give your team the admin panel that you don't have to build. Launch in less time than it takes to run a standup.
You're busy enough with product work to be weighed down building, maintaining, scoping and developing internal apps and admin panels. Forget all of that, and give your team the admin panel that you don't have to build. Launch in less time than it takes to run a standup.
You're busy enough with product work to be weighed down building, maintaining, scoping and developing internal apps and admin panels. Forget all of that, and give your team the admin panel that you don't have to build. Launch in less time than it takes to run a standup.
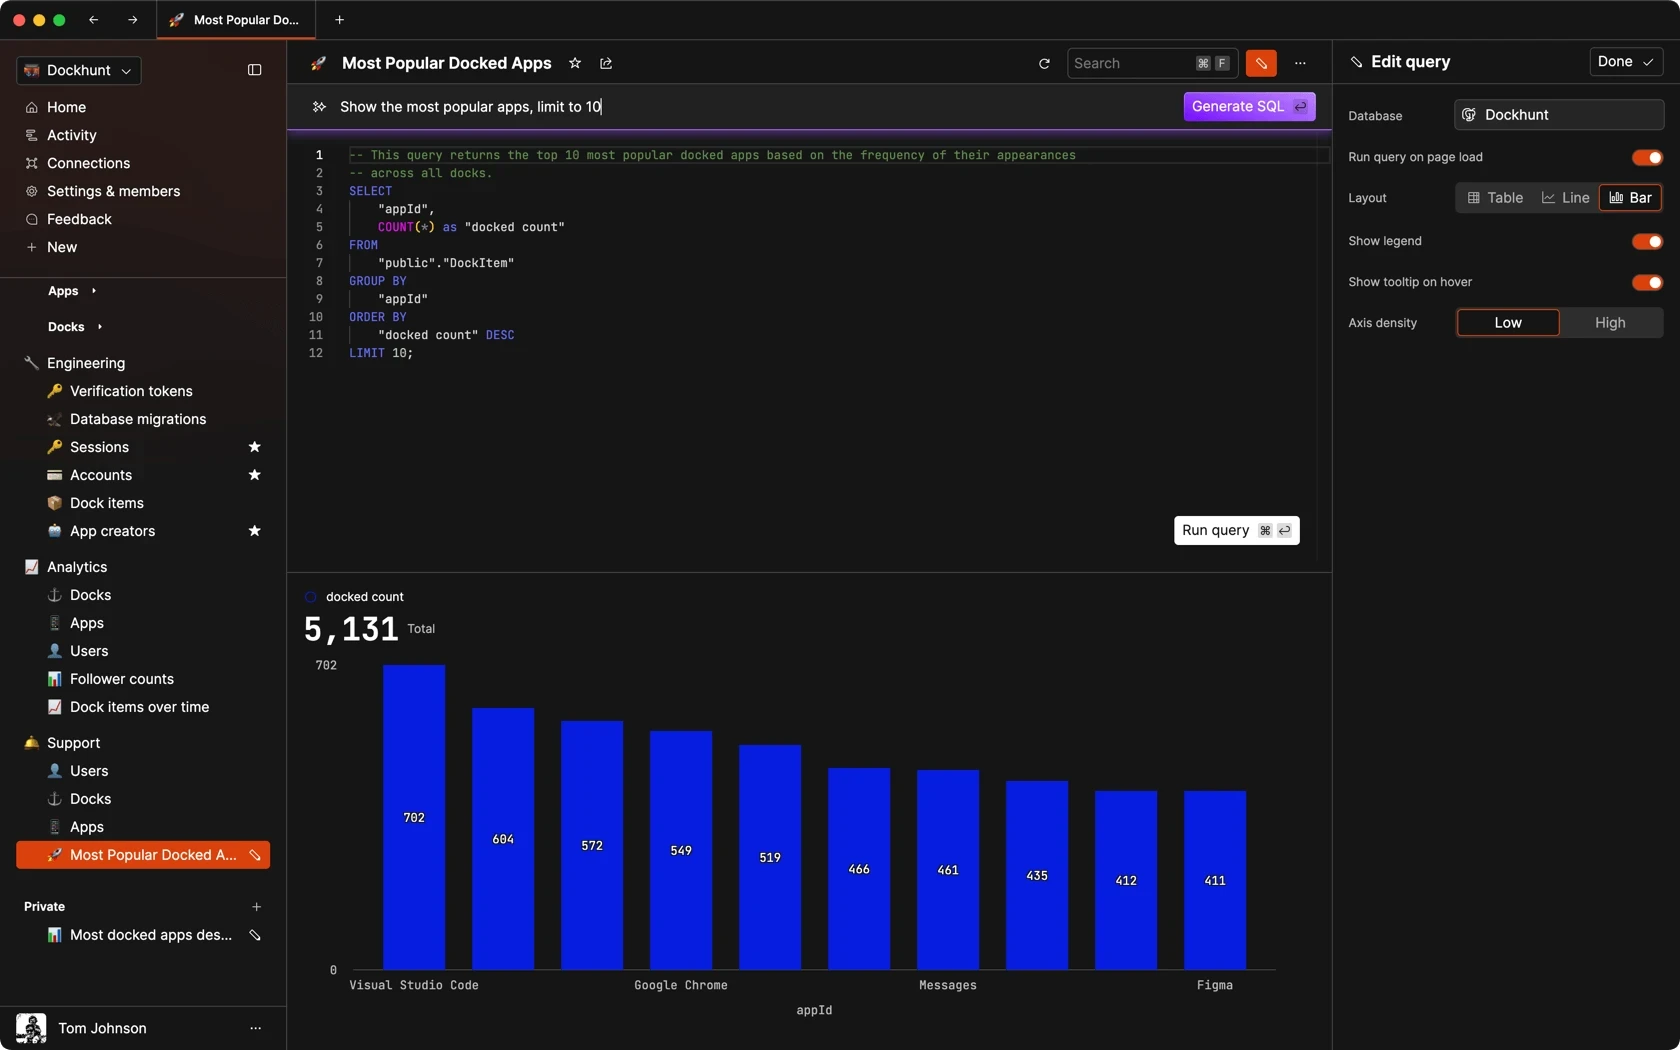
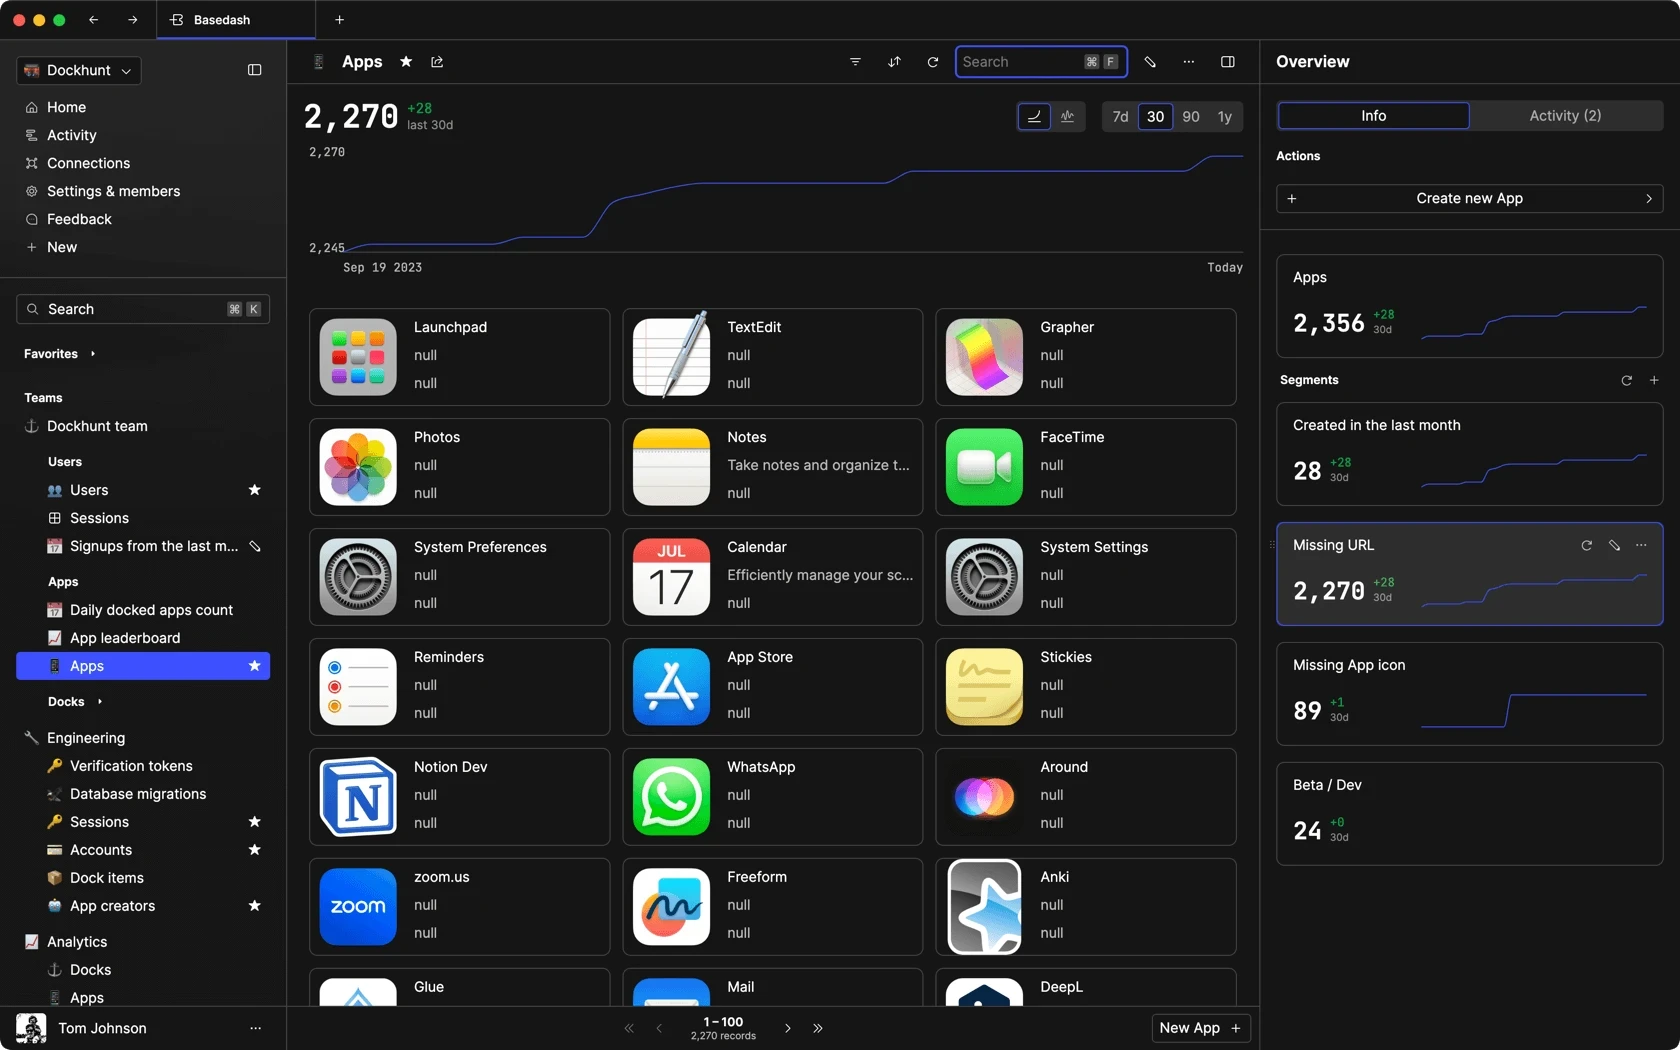
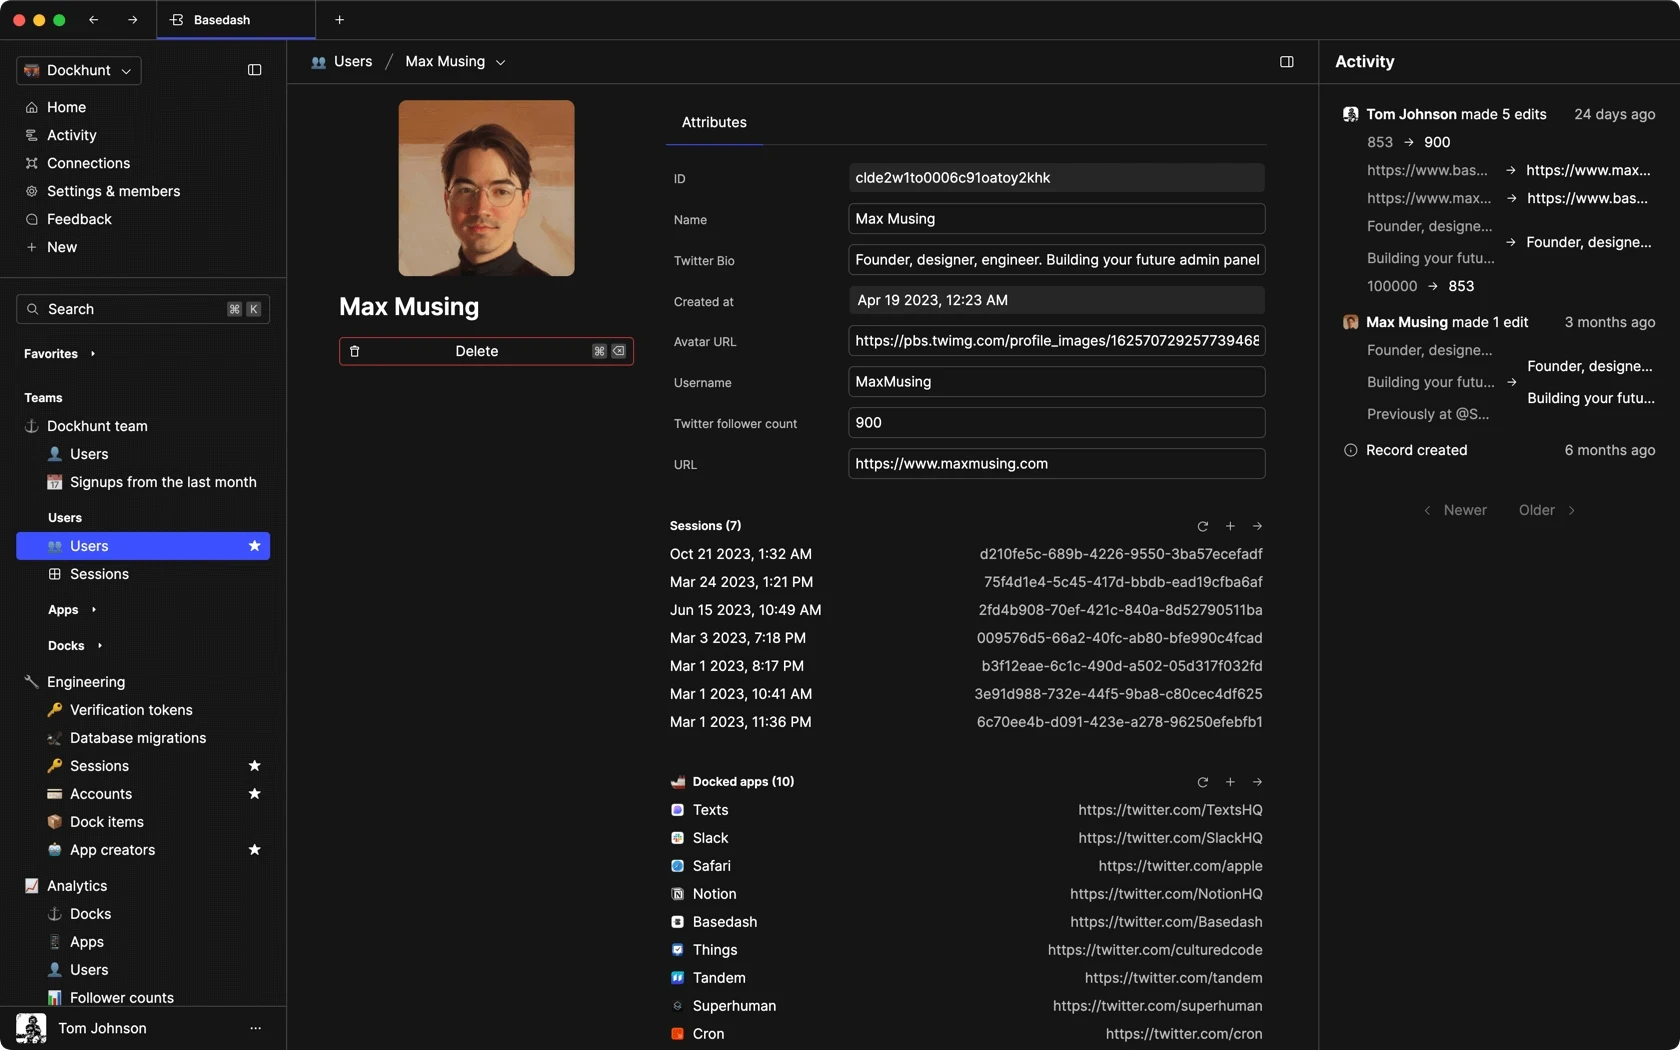
Dashboards and charts
Edit data, create records, oversee how your product is running without the need to build or manage custom software.
USER CRM
ADMIN PANEL
SQL COMPOSER WITH AI
Related posts
Related posts
Related posts

How to Center a Table in HTML with CSS
Jeremy Sarchet

Adjusting HTML Table Column Width for Better Design
Robert Cooper

How to Link Multiple CSS Stylesheets in HTML
Robert Cooper

Mastering HTML Table Inline Styling: A Guide
Max Musing

HTML Multiple Style Attributes: A Quick Guide
Max Musing

How to Set HTML Table Width for Responsive Design
Max Musing